| Here is now I edit out the tripod. There are so
many other ways to do this. I have found that this method yields
the best results 99.99% of the time. There are circumstances where
this will not work. You will then need to use some other
technique. No one single technique works all the time for every
one. This example uses only Photoshop and PTGui in order to obtain
the final panorama. No other software packages were used in
creating this panorama. |
|
| |
|
| The objective here is to give PTGui images that match
as closely as possible prior to stitching. You will not need to
assign extra control points or use the Perspective correction feature.
This method may work for other stitchers. |
|
| |
|
| I use a Nikon D300 and a Nikon 10.5 lens. I shoot
6 around + Zenith + Nadir + Nadir patch. That makes 9 images
total. |
|
| |
|
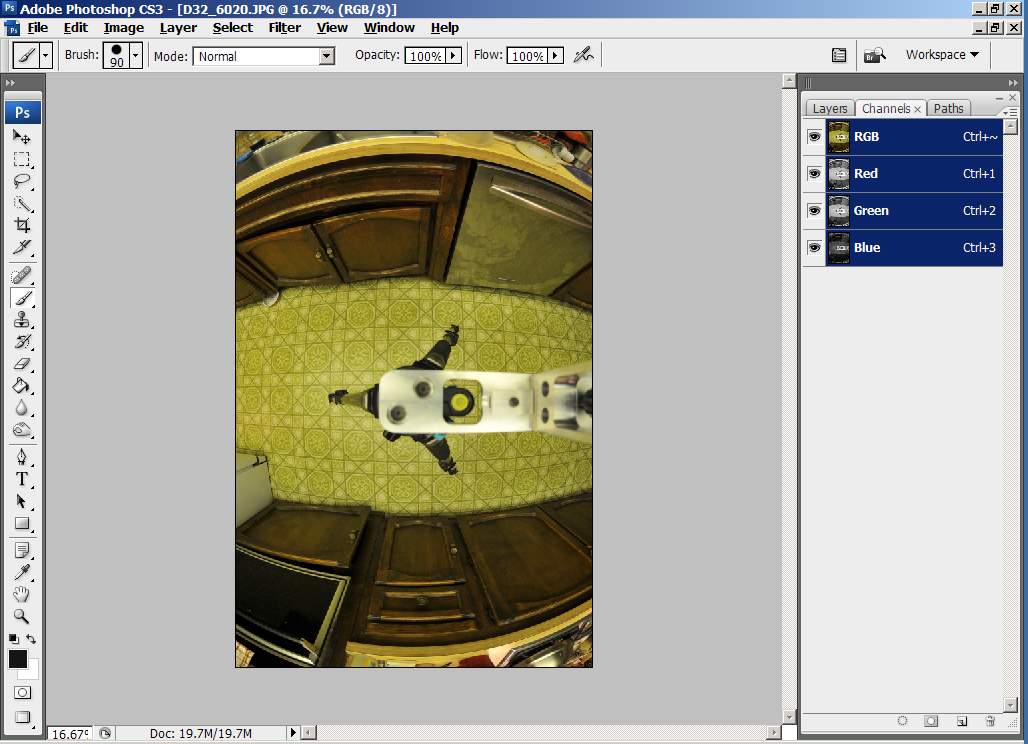 |
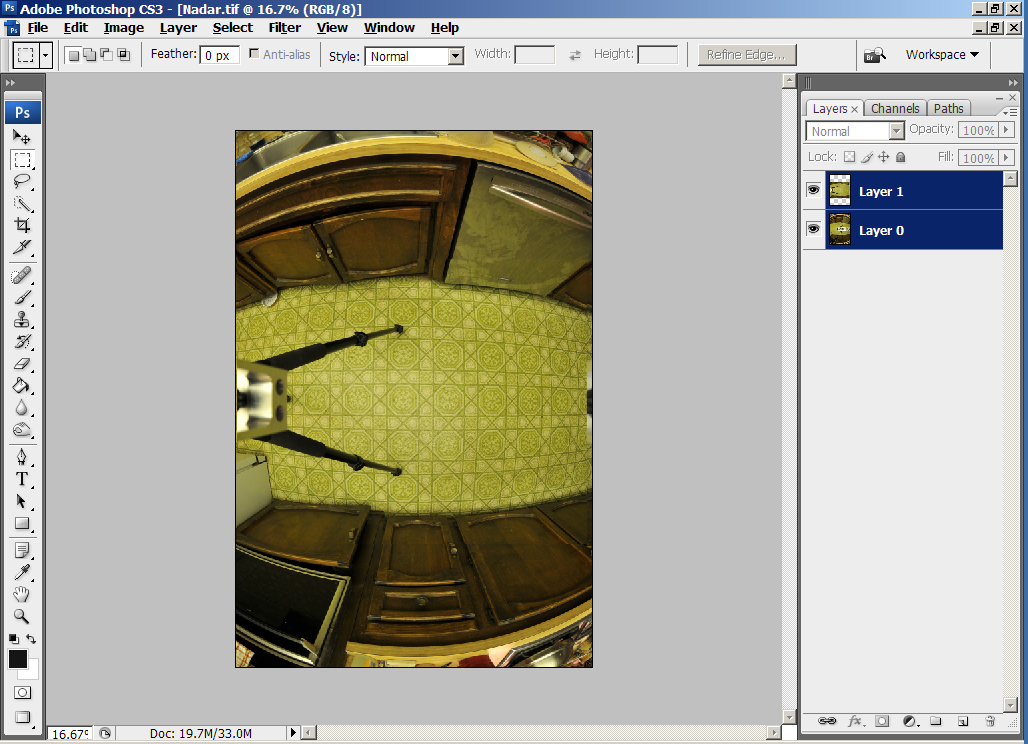
Bring your Nadir shot into Photoshop. CS3 is used
in this example. |
| |
|
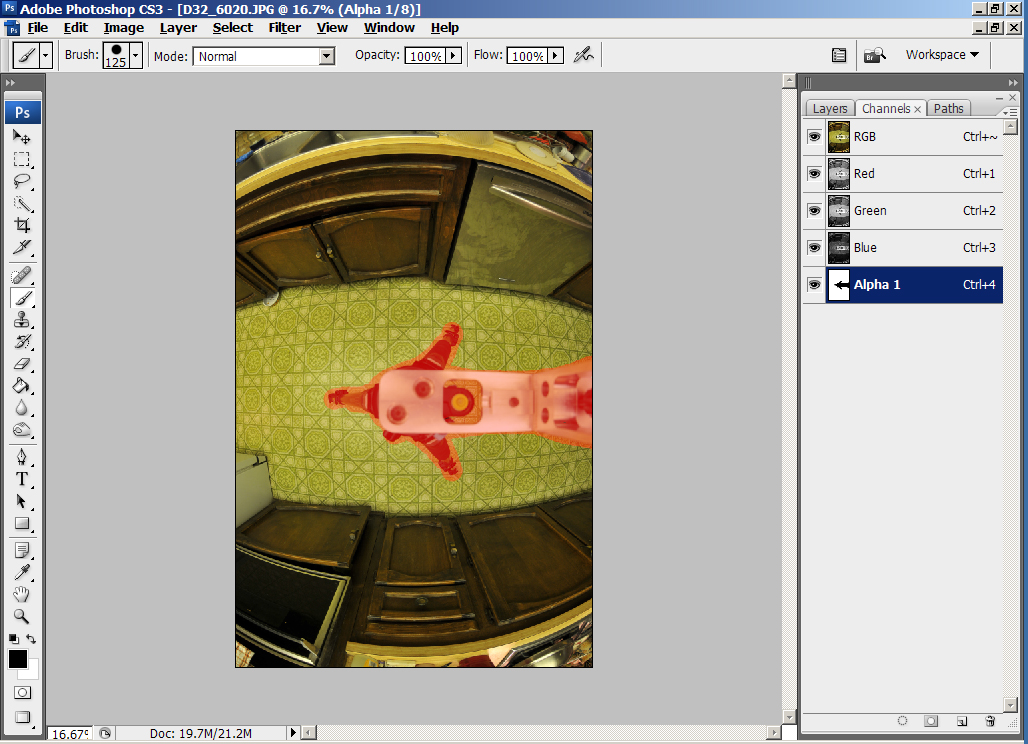 |
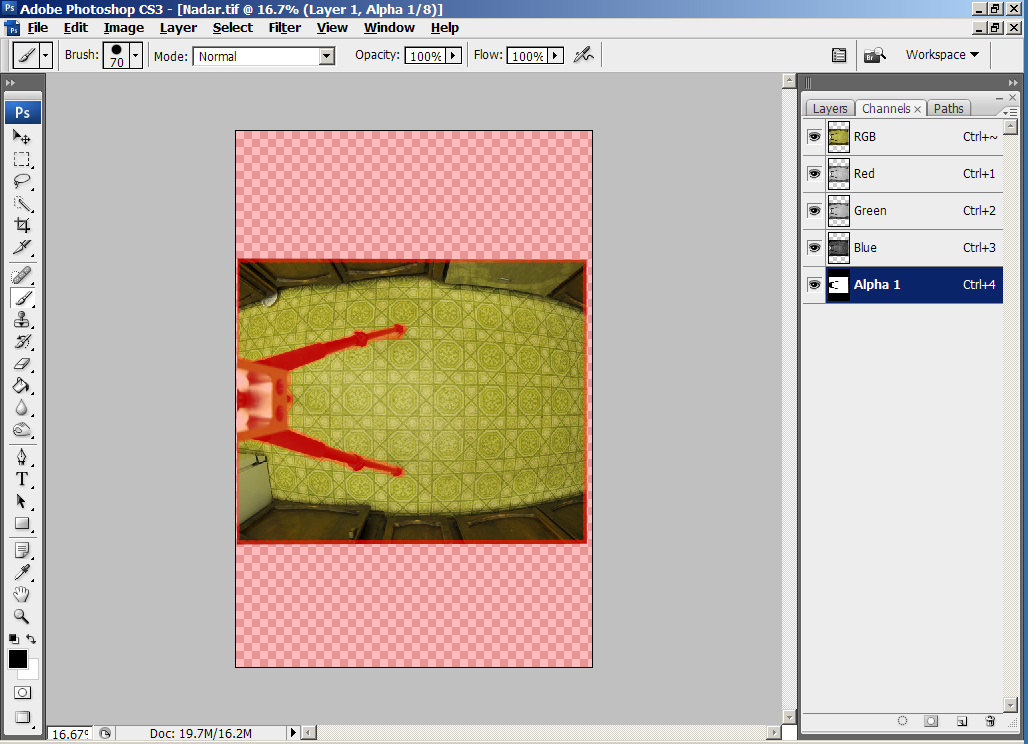
Add an
Alpha Channel
mask to tell PTGui you want to ignore the tripod head. Save this as
Nadir.tif. We will use this image during the rest of this
tutorial.
|
| |
|
| |
|
| We will now start building the patch shot. Start
by deleting the Alpha Channel mask you just created. I know, this
seems counter productive, but we will not need this mask for the patch
shot. |
|
| |
|
| |
|
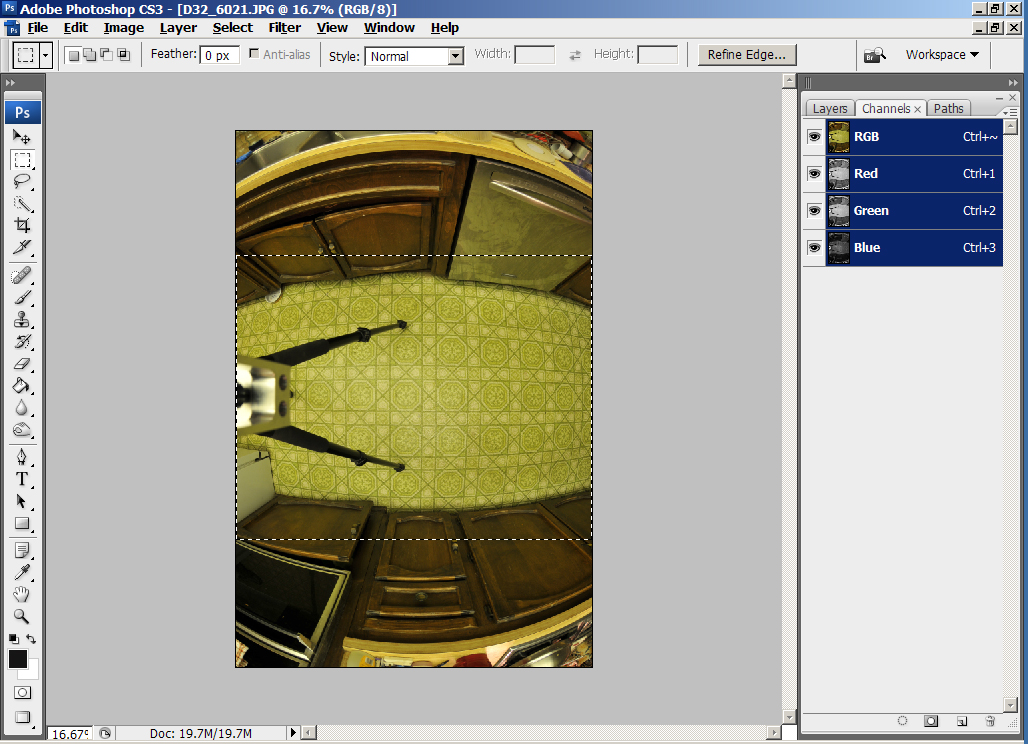 |
Bring your patch shot into Photoshop. Select the
area you want to use as a patch. Do not select the entire
photograph. That will only create more work later on. Hit CTRL+C
to copy this area to the clipboard.
Switch over to Nadir.tif. |
| |
|
| |
|
| |
|
| Remember this spot in the
instructions. You will need to return back to here in a loop and
repeat the following steps until the patch is completely aligned.
It usually takes two or three times. |
|
| |
|
| |
|
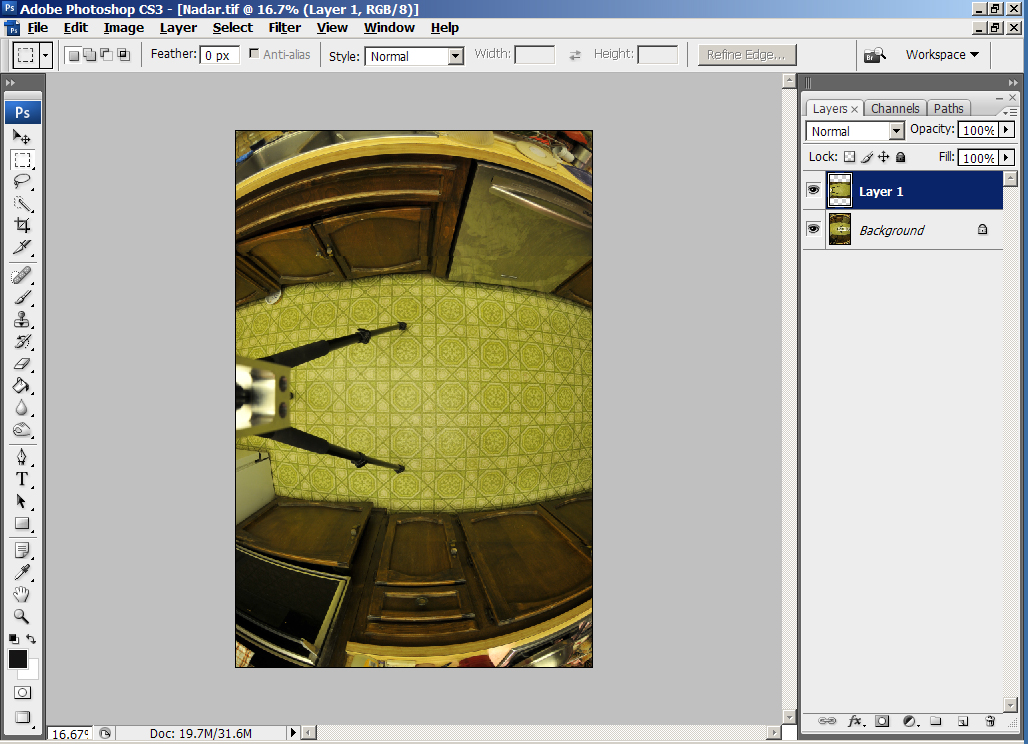 |
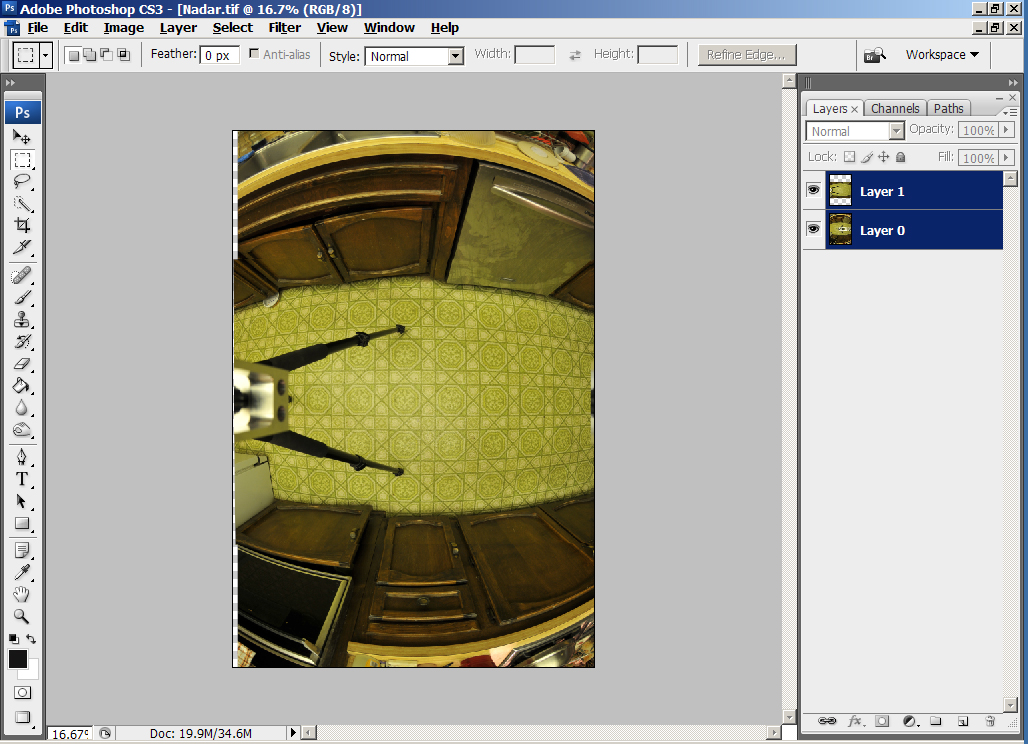
Hit CTRL+V to paste.
This looks ok right now, but it is not quite there. Notice you
now have two layers. One is called "Background"
(your original Nadir.tif) and the other is called "Layer 1". |
| |
|
| |
|
| |
|
 |
Push and hold the shift key while you select both
layers. |
| |
|
| |
|
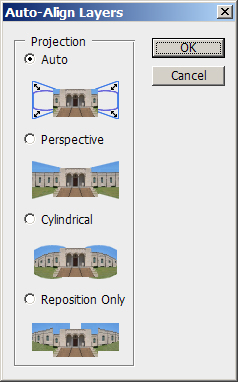 |
From the menu, select Edit, Auto Align Layers.
Make sure to select Auto. Press OK.
|
| |
|
|
|
| |
|
| |
|
| |
|
 |
Photoshop will align the pictures as best it can.
Notice the grey and white squares on the left of the image?
Photoshop had to adjust the background layer. Notice also the
background layer has been renamed. You now have a patch shot that
is getting close to the final objective. |
| |
|
| |
|
| |
|
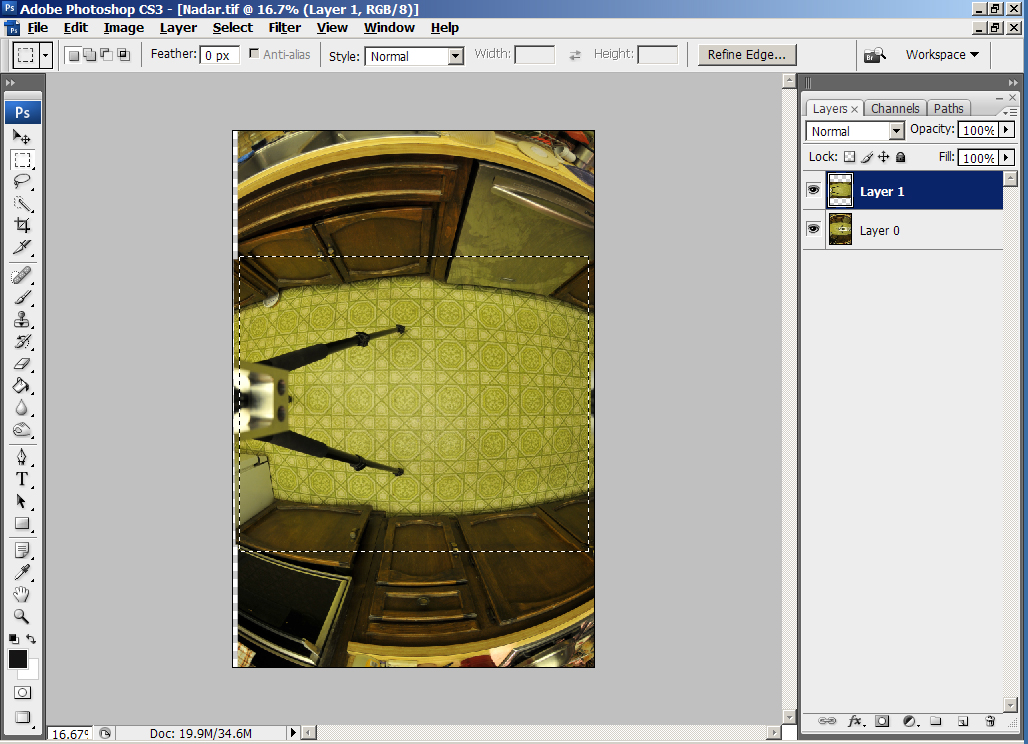 |
Select Layer 1 only. Outline the area of the patch
to be copied again. Do not include any of the grey and white
squares. You may see the squares on the right hand side of the
image. Do not include them in your area selection. Hit CTRL+C to
copy this area to the clipboard. Now you need to undo everything
in order to get back to the original Nadir.tif image. I usually
hit CTRL+ALT+Z until I am back to the original Nadir.tif image. |
| |
|
| |
|
| |
|
|
|
Now go back to the place you were supposed to remember
and repeat the alignment steps until you do not have any of the grey and
white squares after you do an Auto Align on both layers. |
| |
|
| |
|
| |
|
|
|
Here is what it looks like when you have finished
aligning the patch shot. You have the original Nadir.tif image
with the patch shot aligned as well as Photoshop is going to be able to
do. |
| |
|
| |
|
 |
Delete Layer 0 by dragging it onto the little garbage
can icon in the lower right hand corner. You now have only the
patch shot. Add an
Alpha Channel
mask to remove everything except the part of the picture you want to
use. Remember to save this as NadirPatch.tif |
| |
|
| |
|
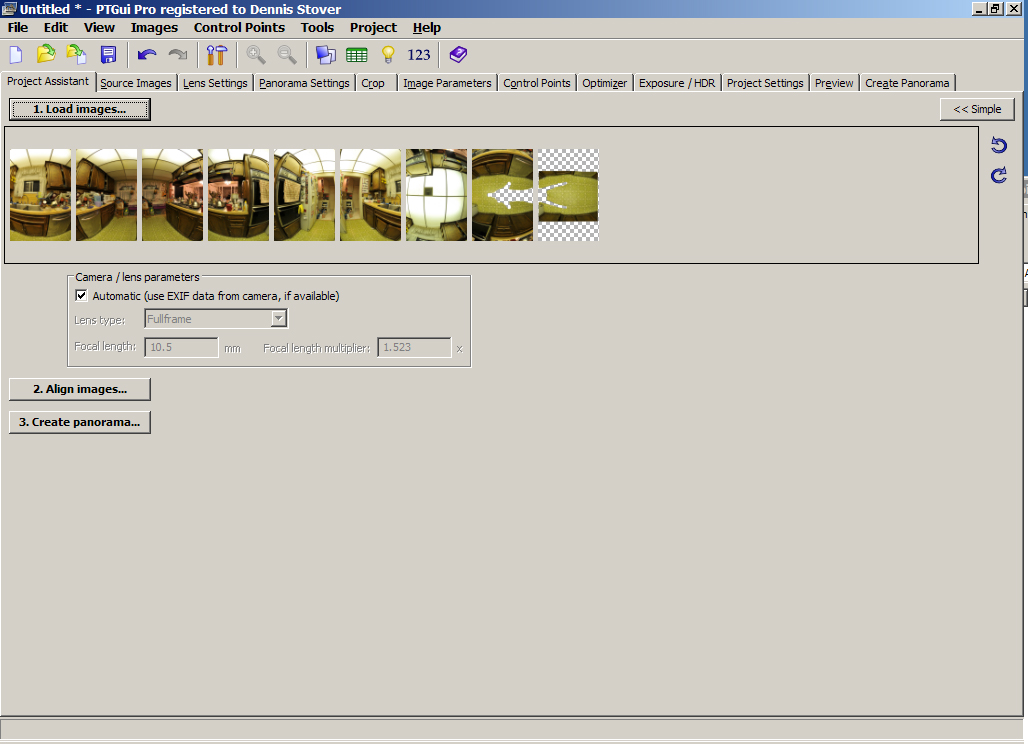 |
Open PTGui and bring in all 9 images. |
| |
|
| |
|
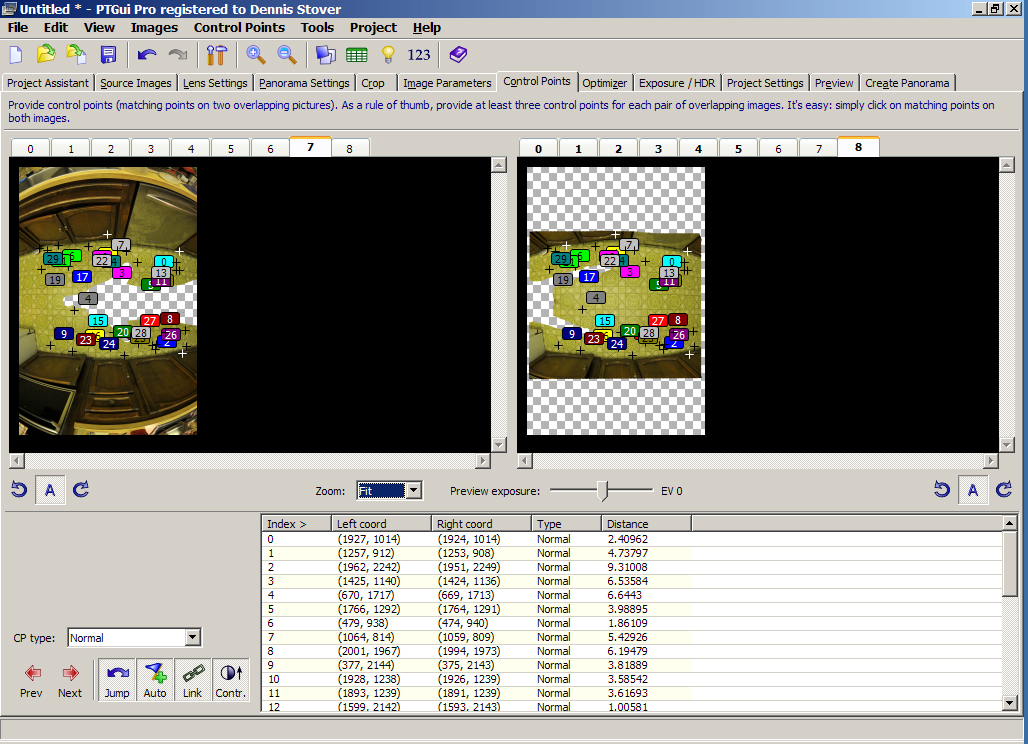 |
Select Align images. You will get control points
for as many images as PTGui can create. I want to give PTGui as
little work as possible during the final stitching. I go to the
Control Points tab and delete all control points from image 8 that are
not linked with image 7. I want control points on the patch shot
to be linked only to the Nadir shot. |
| |
|
| |
|
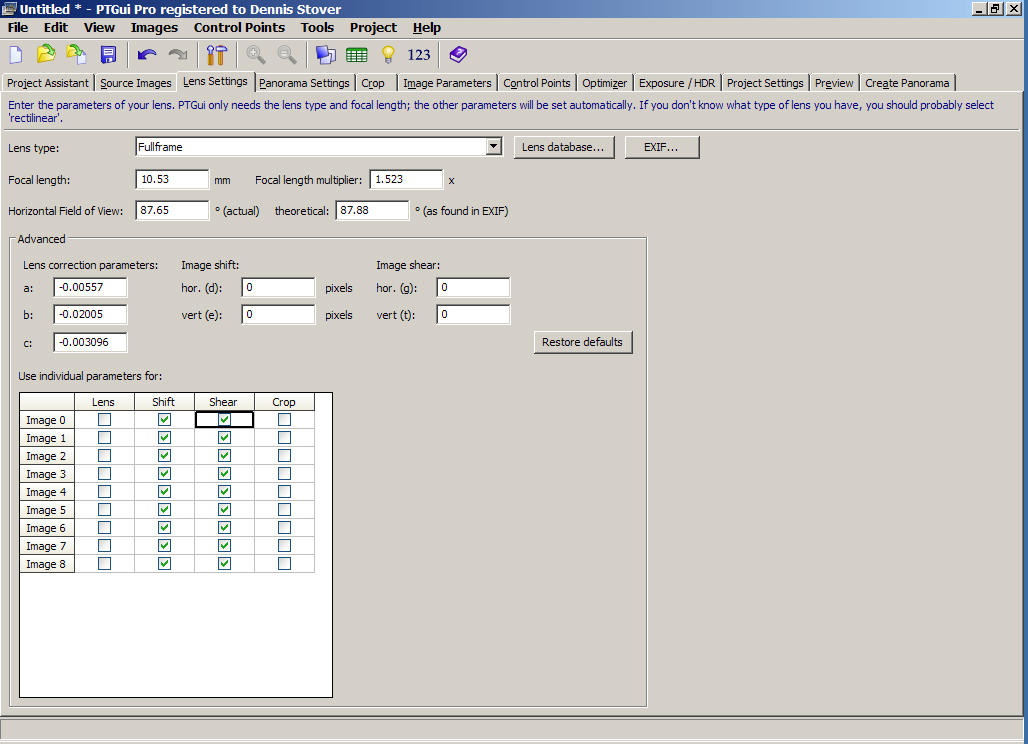 |
I then go to the Lens Settings tab and place a check
mark in all the boxes under "Shift" and "Shear". I want to allow
PTGui to move the images around as it needs to. |
 |
I then hit F5 to optomize. |
|
|
 |
I then tell PTGui to delete the worst control points. |
|
|
 |
After optimizing again, here are the results.
Not stellar, but good enough. I could play the game of
finding the worst control points, deleting them, and optimizing
until the Maximum control point distance is less than 2.
Remember, there are 9 images and no control points have been
manually assigned at this point. Everything has been under
PTGui's control. If needed I add vertical control points
in order to level out the panorama.
|
|
|
 |
Here is what the final Nadir shot looks like. There is no
way I could get the gradual shading/blending done myself in
Photoshop. I would rather let PTGui do what it does
best.
|
|
|
| |
|
| |
|
| I have found that if you give PTGui good images to
start with, you will get beautiful results quicker and easier than if
you let PTGui to do all the work. |
|
| |
|
| If you have multiple Nadir patch shots (when dealing
with tripod leg shadows and such), get then aligned as shown above and
bring them all into PTGui. I have had up to 4 patch shots in
addition to the other 8 panorama shots. PTGui is great at
adjusting the images and blending the final output. |
|
| |
|
| Once you do this a couple of times, you will find that
it takes only minutes to run through the steps. I no longer patch
the Nadir shot prior to or after stitching. I prepare the patch
shot and let PTGui do the rest. |
|
| |
|